Fixing Yellow Headlights: A Comprehensive Guide
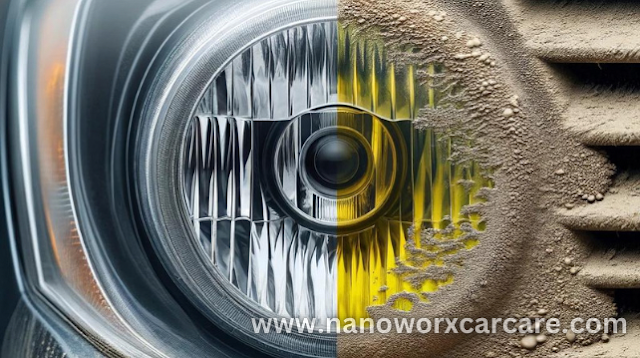
Yellow headlights significantly reduce night-time visibility and road safety. Restoring them involves a series of steps: sanding, polishing, and applying a protective UV coating, ensuring more precise and safer driving.
Discover the detailed steps to reclaim your headlights' clarity and safety in our comprehensive guide ahead.
Quick Navigation
Understanding Yellow Headlights
Preparation for Headlight Restoration
Step-by-Step Headlight Restoration Process
Alternative Restoration Methods
Maintenance and Protection
Cost Considerations
Troubleshooting Common Issues
Brightening the Road Ahead: A Headlight Restoration Summary
Preparation for Headlight Restoration
Step-by-Step Headlight Restoration Process
Alternative Restoration Methods
Maintenance and Protection
Cost Considerations
Troubleshooting Common Issues
Brightening the Road Ahead: A Headlight Restoration Summary
Understanding Yellow Headlights
Yellowed headlights are a common issue for car owners, but what causes this frustrating dimming effect? Let's take a closer look at the critical factors behind this phenomenon.
UV Oxidation
Over time, this reaction causes the plastic to oxidize and turn yellow, diminishing its clarity and brightness. Regular exposure to sunlight accelerates this process, making it a frequent problem for vehicles.
Dirt and Chemical Buildup
Regular cleaning can mitigate this effect, but the buildup can become significant without proper maintenance.
Condensation and Water Damage
In some cases, it can also damage the headlight components internally, further affecting their performance and appearance.
Wear and Tear Over Time
This natural wear and tear, combined with the factors mentioned above, results in the gradual yellowing of the headlights.
Preparation for Headlight Restoration
Gathering Materials
First, you'll need to assemble your materials. This includes varying grits of sandpaper (600, 1000, and 2000 are commonly used), a polishing compound, UV-resistant sealant, and basic cleaning supplies like soapy water and a soft cloth.
For a more thorough job, consider getting a plastic polishing compound and a flannel polishing cloth. These materials gently remove the yellowed layer and restore the headlight's shine.
Cleaning the Headlights
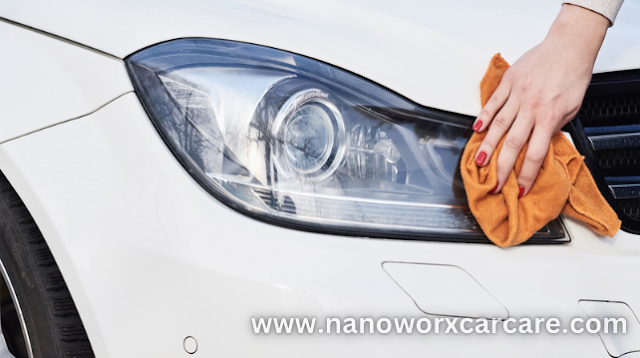
Rinse the headlights well and dry them with a soft cloth. This step ensures that you're working with a clean surface, which is essential for both sanding and polishing steps to work effectively.
Taping Off the Area
Taking this precaution helps to keep the rest of your vehicle safe as you focus on restoring the headlights.
Setting Up Your Workspace
If you're working outdoors, choose a day with mild weather; too much sun can dry out the products quickly, and rain can ruin restoration.
Safety First
Working safely ensures that the headlight restoration process is effective and enjoyable.
Step-by-Step Headlight Restoration Process
Transforming your yellowed headlights back to their original luster is a rewarding process. Let's walk through the steps to achieve that new headlight shine.
Sanding
Start your headlight detailing with the sanding process. Use 600-grit sandpaper to gently sand the headlight surface. This coarse grit effectively removes the heavily oxidized top layer.Always keep the surface wet while sanding; this helps to prevent scratches.
After the initial sanding, progress to finer grits like 1000 and 2000. Each step gradually smoothens the headlight surface, preparing it for polishing. Remember, even and consistent strokes are crucial to achieving a uniform finish.
This process removes any fine scratches left by sanding and restores the clear shine to the headlights. It is essential to take your time and ensure that the entire surface is polished evenly.
Apply the sealant evenly across the headlight surface and let it dry according to the product's instructions. This protective layer not only prolongs the clarity of the headlights but also defends against the harmful effects of UV rays.
After the initial sanding, progress to finer grits like 1000 and 2000. Each step gradually smoothens the headlight surface, preparing it for polishing. Remember, even and consistent strokes are crucial to achieving a uniform finish.
Polishing
The next step after sanding is polishing. Apply a small amount of plastic polishing compound to a flannel or microfiber cloth and work it into the headlight in a circular motion.This process removes any fine scratches left by sanding and restores the clear shine to the headlights. It is essential to take your time and ensure that the entire surface is polished evenly.
Applying UV-Resistant Sealant
The final step is to apply a UV-resistant sealant. This step is crucial as it protects the headlight from future oxidation and yellowing.Apply the sealant evenly across the headlight surface and let it dry according to the product's instructions. This protective layer not only prolongs the clarity of the headlights but also defends against the harmful effects of UV rays.
Buffing
Once the sealant has dried, give the headlights a final buff with a clean and dry cloth. Buffing will remove any residual product and enhance the shine. Your headlights should now look significantly clearer and will provide better illumination when driving at night.Checking and Adjustment
After the restoration process, it's a good idea to check the alignment and focus of the headlights. Restored clarity might reveal misalignments that were not noticeable before. If necessary, adjust the headlights to ensure proper illumination on the road.Alternative Restoration Methods
While sanding and polishing are the go-to methods for restoring yellow headlights, alternative approaches exist for those seeking different solutions or facing unique circumstances.Home Remedies
For a quick, temporary fix, home remedies can be surprisingly effective:- Toothpaste Method: Regular whitening toothpaste can be used to clean headlights. Apply it with a soft microfibre cloth in circular motions, then rinse off. Its mild abrasiveness helps remove superficial yellowing.
- Baking Soda and Vinegar: Combine baking soda and vinegar to create a paste. Apply the mixture to the headlights and scrub gently. This combination can break down grime and reduce yellowing.
Professional Resurfacing or Replacement
In cases where DIY methods fall short or the headlights are severely damaged:- Professional Resurfacing: This option involves a car care professional using specialized tools and techniques to restore the headlights. It's more costly but can yield high-quality results.
- Headlight Replacement: If the headlights are beyond repair, replacement is the best option. Though expensive, it guarantees restoration of light clarity and vehicle appearance.
Using Restoration Kits
Headlight restoration kits available in the market can also be a handy alternative. These kits usually contain all necessary components, such as sandpaper, a polishing compound, and a sealing coat. They provide a structured process and are designed for easy use by non-professionals.Each method has its pros and cons. Home remedies are cost-effective and straightforward but offer temporary solutions. Professional services, while expensive, deliver lasting results. Restoration kits strike a balance between DIY and professional quality.
Maintenance and Protection
Adhering to these maintenance and protection strategies can significantly extend the life of your headlights while maintaining their functionality and aesthetic appeal.Regular Cleaning
- Routine Washing: Regularly wash your headlights with car shampoo or a mild soap solution. This process removes dirt and chemicals that can cause them to yellow or blur.
- Soft Cloth Cleaning: Use a soft cloth or sponge to avoid scratching the headlight surface. Harsh brushes or abrasive materials can damage the protective coating.
Applying Protective Sealants
- UV Protection: Use UV-resistant sealants to protect the headlights from sun damage. These sealants form a protective layer against UV rays, which primarily cause yellowing.
- Reapplication: Depending on the product, reapply the sealant every few months to maintain its effectiveness.
Avoiding Harmful Substances
- Chemical Exposure: Be cautious of harsh chemicals, like specific cleaning agents or road salts, that can deteriorate the headlight material.
- Covering When Not in Use: To protect against environmental factors, park your vehicle in a covered garage or use a light plastic car cover.
Regular Inspections
- Checking for Damage: Periodically inspect your headlights for any signs of damage, such as cracks or deep scratches, which can worsen over time and affect light clarity.
- Professional Check-ups: Consider having a professional inspect your headlights during routine vehicle maintenance for any underlying issues that may not be visible to the naked eye.
Cost Considerations
Balancing these cost considerations with the severity of your headlight condition and long-term vehicle maintenance plans will help you choose the most economical and practical approach.DIY Restoration Costs
- Materials: If you're going the DIY route, purchase materials like sandpaper, polish, and sealant. Depending on the quality, these can be very affordable to moderately priced.
- Home Remedies: Using household items like toothpaste or baking soda can be a cost-effective, albeit temporary, solution.
- Restoration Kits: Commercially available headlight restoration kits vary in price but generally offer a middle ground between basic DIY and professional services.
Professional Restoration Costs
- Service Fees: Professional headlight restoration can be more expensive than DIY methods. Prices vary widely based on location, the severity of the yellowing, and the service provider's reputation.
- Longevity and Quality: While more costly upfront, professional services often provide longer-lasting results and may offer warranties or guarantees for their work.
Replacement Costs
- New Headlights: In cases where restoration isn't feasible, purchasing new headlights is the most expensive option. Prices can vary dramatically depending on the make and model of your vehicle and whether you choose OEM (original equipment manufacturer) or aftermarket parts.
Preventative Measures
- Protective Films and Sealants: Investing in protective measures like UV-resistant sealants or paint protection films might have an initial cost but can save money in the long run by extending the life of your headlights and reducing the need for frequent restorations.
Troubleshooting Common Issues
Addressing these common issues promptly and effectively can ensure that your headlight restoration remains durable and your headlights stay clear for longer. Patience and attention to detail are vital in achieving the best results and preventing the recurrence of these problems.Uneven Sanding
- Problem: Uneven sanding can leave the headlight surface patchy or streaky, affecting the final result.
- Solution: Ensure consistent pressure and motion during the sanding process. If unevenness appears, go back over the area with the same grit sandpaper until it evens out, then progressively move to finer grits.
Residual Haze After Polishing
- Problem: Sometimes, a haze can remain on the headlights even after polishing, usually due to insufficient polishing.
- Solution: Reapply the polishing compound and polish the area, covering the entire surface evenly. Using a higher-quality polish or a different polishing technique can also help.
Scratches Left After Restoration
- Problem: Fine scratches can be left on the headlights, often due to improper sanding.
- Solution: These can typically be remedied by re-sanding the area with a finer grit, followed by repolishing. Make sure the headlight is kept wet during sanding to minimize scratches.
Sealant Not Adhering Properly
- Problem: Sometimes, the UV-resistant sealant may not adhere properly, leading to peeling or flaking.
- Solution: Ensure the headlight surface is spotless and dry before applying the sealant. If the problem persists, remove the sealant, reclean the surface, and reapply.
Preventing Future Yellowing
- Problem: Headlights may begin to yellow again over time.
- Solution: Regular maintenance, including routine cleaning and periodic application of UV-protective products, can significantly prolong the clarity of your headlights. Consider applying a paint protection film for added longevity.
Brightening the Road Ahead: A Headlight Restoration Summary
However, the work continues beyond restoration. The real key lies in ongoing maintenance and protection. Regular cleaning, applying protective sealants, and addressing minor issues before they escalate are all vital to preserving the life and clarity of your headlights.
Embracing these practices ensures that your path remains brightly lit, enhancing your car's aesthetics and safety.


